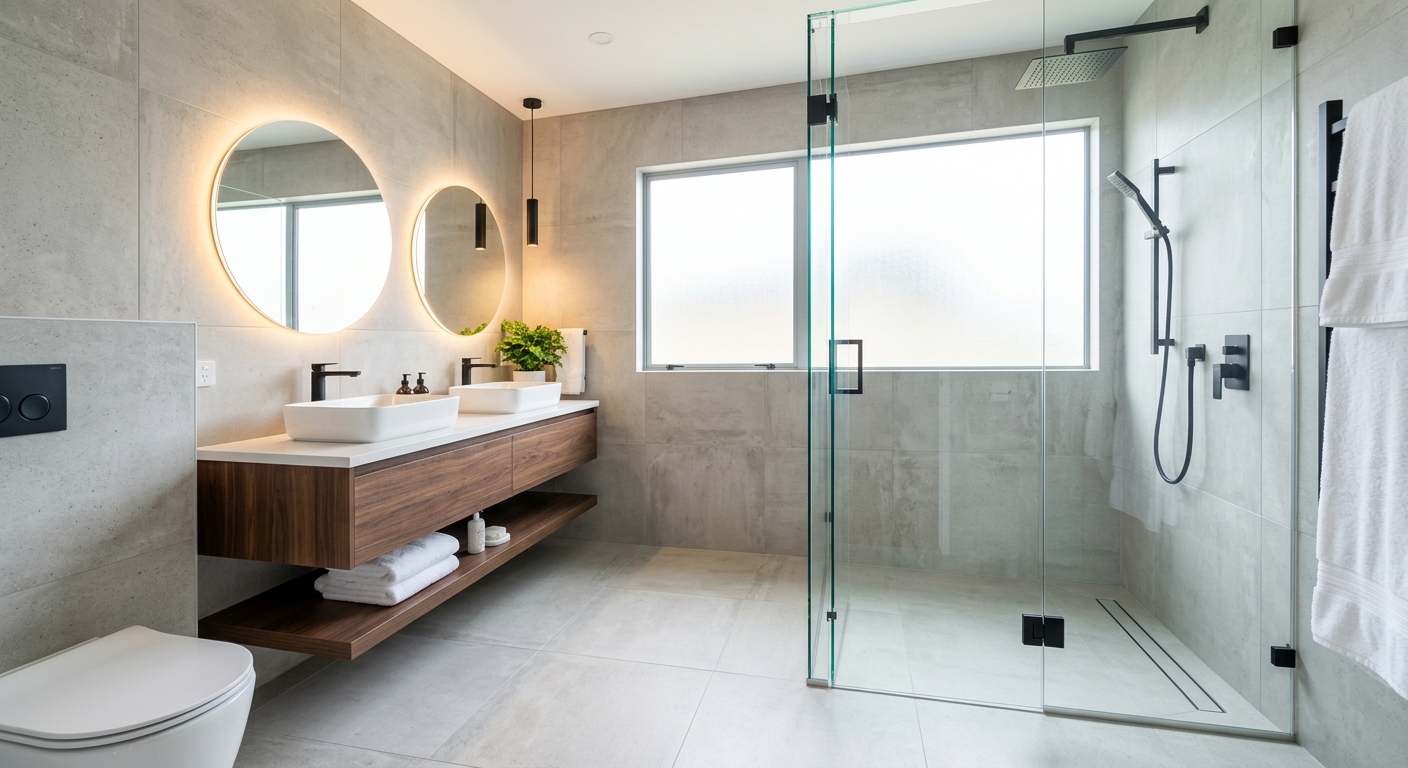
Bathroom renovation options and costs in Haliburton Village
Bathroom renovation in Haliburton Village usually starts with deciding how much change you want—cosmetic swaps, a mid-range rebuild, or a higher-end transformation. Because Haliburton Village sits within the Muskoka–Kawarthas housing market, many bathrooms are in homes with older plumbing layouts, and that reality shows up in pricing. In fact, the region’s population is small (1,149 residents as of the 2021 Census), so trades can be booked further out during peak season and job scheduling becomes part of the cost equation (Statistics Canada, 2021 Census). You’ll also find a meaningful number of older in-town houses where dated drain stacks or ventilation paths were set up for the technology of the day—often with limited GFCI protection and fan ducting that isn’t to current best practice.
In the Muskoka–Kawarthas region, bathroom renovation costs are driven more by labour coordination and hidden conditions than by extreme weather. Moisture is still a constant here, and the way Ontario homes “breathe” (or don’t) affects how we plan waterproofing and exhaust. Many projects are concentrated around Haliburton’s busiest residential pockets—particularly around the core in and near Main Street—where demand for tilers, plumbers, and electricians is steady. When contractors find older workmanship (or past DIY work), the “simple” plan can shift toward full renovation scope, which is why you’ll see mid-range projects land in the same general range as full renos in some cases—especially once re-piping, re-venting, or electrical updates are required.
Use the table below to compare common scopes and how long they typically take, then we’ll break down the price drivers and what to verify before you sign a contract.
| Renovation Scope |
What's Included |
Typical Duration |
Price Range |
| Cosmetic refresh (paint, fixtures, accessories only) |
New vanity or updated faucet, toilet refresh (if replacing), paint, mirror, towel bars, drain/stopper service, caulking/finishing; no rough-in changes |
3–6 days |
$3,000 – $7,500 |
| Mid-range full renovation (new tile, vanity, tub/shower, electrical) |
Demolition, subfloor checks, new shower/tub surround tile, new vanity + toilet, updated exhaust fan ducting, new GFCI-protected outlets, waterproofing, grout/caulk, basic trim |
2–3 weeks |
$12,000 – $25,000 |
| High-end full renovation (custom tile, steam shower, heated floors) |
Custom layout options, premium tile and setting materials, heated floor circuit, higher-end fixtures, larger-format tiling, steam-ready plumbing/electrical coordination, elevated waterproofing and finishing |
3–5 weeks |
$22,000 – $40,000 |
| Shower-only installation (convert tub to walk-in shower) |
Demo and tub removal, waterproofed shower pan/surround, niche/shelf options, frameless or semi-frameless glass, exhaust/fan check, new valve trim and rough-in adjustments if needed |
2–3 weeks |
$10,500 – $19,500 |
| Bathtub replacement or tub-liner install |
New tub replacement or approved liner system, recaulk and finishing, basic plumbing connection checks, tile touches/trim adjustments |
5–10 days |
$800 – $2,500 |
| Tile-only installation (floor + surround, existing layout kept) |
Floor + wall tile removal/replace as required, membrane/waterproofing where applicable, new grout and silicone detailing, matching trim; existing vanity/plumbing retained |
1–2 weeks |
$2,500 – $9,000 |
Prices are estimates only and vary by project scope, site access and material selection.
What affects the price of bathroom renovation in Haliburton Village
In Haliburton Village, the same “bathroom reno” can come in 30–50% apart depending on how the quote is scoped. In the Muskoka–Kawarthas region, that gap is usually less about climate extremes and more about labour rates, jobsite logistics, and the age of the housing stock. Contractors often coordinate multiple trades—plumbing, electrical, tiling, carpentry—so the true driver is how many days of multi-trade work get triggered once demolition reveals what’s behind the walls. Many homes in this region predate modern waterproofing standards and may have ventilation that doesn’t move enough moisture, which pushes the project toward re-venting and upgrading the fan circuit as part of a safe, code-aligned result.
Older homes in the Muskoka–Kawarthas region commonly hide surprises such as cast-iron or copper drain stacks that require upgrading, galvanized supply lines that need replacement, and bathroom exhaust that doesn’t duct properly. Those items inflate scope and labour—so a plan that looks like a “simple” update can quickly move into mid-range full renovation territory (often around the $12,000–$25,000 band). In some pre-1985 floor tile or drywall compound conditions, asbestos can be present, and when it is, abatement protocols add cost; a common budgeting reality is that asbestos-related work can add $1,500–$5,000+ depending on what’s found and how much material is affected.
Concrete examples we see locally: (1) adding a second GFCI outlet and dedicated exhaust wiring can add hours because electrical work must be integrated cleanly; (2) switching to large-format porcelain increases layout time and tile-setting complexity; and (3) if the subfloor is wavy or has rot spots near the flange, the underlayment rebuild adds cost but prevents future cracked grout. In short, good planning keeps you within your chosen band, while discovery work is what nudges budgets upward.
| Price Factor |
Why It Matters |
Cost Impact |
| Layout change — moving drain or supply lines requires rough-in work |
Rough-in plumbing is multi-step work (cutting, framing, re-routing, pressure testing, finishing) |
Often +$2,000 – $7,000+ |
| Tile selection — large-format porcelain vs. mosaic vs. ceramic |
Harder materials and bigger panels increase cutting, setting time, and waste rates |
Often +$1,000 – $4,000 |
| Fixture tier — builder-grade vs. mid-range vs. designer brands |
Premium trims and valves may require more specific installation and sometimes different rough-in parts |
Often +$500 – $3,500 |
| Subfloor condition — rot or unlevel concrete adds scope |
Prevents tile failure and keeps waterproofing reliable |
Often +$800 – $5,000 |
| Electrical — adding GFCI outlets, exhaust fan, heated floor circuit |
Coordination and code requirements can expand wiring, fan duct power, and circuit layout |
Often +$700 – $4,000 |
| Waterproofing method — membrane type and extent |
Better membranes and full-area coverage reduce mould and leak risk |
Often +$500 – $3,000 |
| Older-home surprises — asbestos tile, cast-iron drains, galvanized pipes |
Discovery triggers remediation/upgrade steps and time for safe removal and proper disposal |
Often +$1,500 – $10,000+ |
| Bathroom size — sq ft drives tile and labour time directly |
More square footage means more tile, more setting, more waterproofing and cure times |
Often +$1,500 – $6,000+ |
Permits & regulations in Ontario
In Ontario, cosmetic bathroom updates generally do not need a permit. That usually includes swapping fixtures (toilet, vanity, faucet), repainting, replacing accessories, and even retiling where plumbing routes and electrical circuits are not changed. However, permits typically come into play when you relocate plumbing or electrical components, or when you change structural elements. In plain terms for Haliburton Village homeowners: if your renovation plan keeps the same drain and supply locations and you’re only finishing surfaces, it’s often in the “no permit” zone. If you change where water and waste lines run, add new ventilation that involves new electrical wiring, or touch structure (blocking, studs, framing), you should expect permits and inspections.
Electrical work must meet Ontario code and be performed by a licensed electrician, or signed off by one. Plumbing rough-in changes—such as moving a shower drain, adding a new valve location, or re-routing venting—generally require a permit and inspection. Before you hire anyone, verify three items step-by-step: (1) confirm the contractor’s Ontario trade licence (use the contractor’s licensing details they provide and cross-check the appropriate provincial registry entry when available); (2) request a certificate of insurance and confirm liability coverage is active for the project dates; and (3) ask for WSIB/WCB clearance or coverage confirmation (and keep a copy for your records). A legitimate contractor will provide documentation without hesitation and will name which parts of the job are permitted, inspected, and which trades hold the licensed work.
Choosing tile, waterproofing and fixtures for your Haliburton Village bathroom
When you renovate in Haliburton Village, your biggest budget levers are the three material decisions that directly control labour complexity and long-term durability: tile choice, waterproofing system, and fixture tier. First, tile. Ceramic is the entry-level option, and it can look great when installed correctly, but it’s more forgiving and sometimes less resilient for high-impact areas. Porcelain typically offers a better balance of durability and design options, while natural stone (marble, travertine, slate) creates a luxury look that can justify higher material and extra installation care. Labour changes here matter: porcelain and stone often require more precise cutting and a more deliberate layout, especially around niches and shower walls.
Second, waterproofing. Ontario bathrooms run humid, and moisture management is non-negotiable. A paint-on membrane can work for certain applications, but for many showers we recommend a bonded sheet membrane or a proven system (including compatible board and details at corners, seams and transitions). The right system helps prevent mould by keeping water where it belongs and allowing vapour to be managed through proper exhaust.
Third, fixture tier and resale impact. Builder-grade fixtures control upfront cost; mid-range improves finishes and sometimes components like valves and shower trims; designer brands can boost the perceived value, but only if the rough-in and waterproofing are done right. A specific example: upgrading from standard ceramic to porcelain might be a $1,500–$3,000 difference in material and setting time, but that spend is justified when you choose a simpler layout pattern and a reliable waterproofing method—because it reduces future rework risk. If your budget is tight, it’s usually smarter to invest in waterproofing quality and a few key visible upgrades (like a proper glass enclosure) than to overspend on decorative stone everywhere.
| Material / Option |
Pros |
Cons |
Price Range |
| Ceramic tile (floor + walls) |
Great value, wide style range, easier to source and match |
Can be less durable than porcelain in wet/heavy-traffic zones |
$1,500 – $4,500 |
| Porcelain tile (floor + walls) |
Higher durability, better water resistance, cleaner look with large-format options |
More expensive material and can increase cutting/waste if layout is complex |
$2,500 – $7,500 |
| Natural stone (marble, travertine, slate) |
Premium look, unique veining, strong resale appeal when used thoughtfully |
Extra care and sometimes sealing/maintenance; higher labour complexity |
$4,500 – $12,500 |
| Frameless glass shower enclosure |
Modern, brightening effect; easier to keep clean than framed systems |
Requires accurate waterproofing edges; glass and hardware cost more |
$1,200 – $3,800 |
| Prefab tub surround (acrylic) |
Fast install, consistent fit, low maintenance, good for budget-conscious renos |
Less custom look; colour/style limitations; seams still need careful finishing |
$600 – $2,200 |
| Custom shower pan (tile or linear drain) |
Best performance for modern showers; accommodates slopes and premium drains |
More labour and detailed waterproofing at seams and transitions |
$2,800 – $9,000 |
How to choose a bathroom renovation contractor in Haliburton Village
Start by verifying Ontario licensing, liability insurance, and WSIB/WCB coverage—then confirm the quote is written in a way you can actually compare. In practice, you want each trade’s responsibilities clear: electrical should be handled by a licensed electrician, and any plumbing rough-in should be performed by an appropriate licensed plumber. To check coverage, ask for a current certificate of insurance and confirm it matches the contractor/company legal name on the quote. For WSIB/WCB, request proof of clearance or coverage documentation before work starts. Don’t accept “we’re covered” without paperwork.
Next, get 2–3 itemised written quotes, ideally with a labour-and-materials breakdown rather than one lump sum. Itemisation matters in Muskoka–Kawarthas because pricing swings when scope expands—like adding GFCI protection, changing venting, or upgrading waterproofing details. Read the scope carefully: is permit pulling included (and who is responsible for inspections), is demolition and disposal included, and what’s the allowance for tile, fixtures, and glass? Also check warranty terms: workmanship warranty length (often 1–3 years), product/manufacturer warranty for fixtures (which can vary widely), and whether warranties are transferable if you sell your home.
Finally, keep your payment schedule controlled. For most renovations in Ontario, never pay more than about 10–15% upfront. Hold back remaining funds until the work is complete and deficiencies (caulking, grout joints, sealant transitions, fan operation) are addressed. Get the start date and completion estimate in writing so you can plan around the bathroom downtime.
- Request an Ontario licence number (and match it to the company name on the contract).
- Confirm liability insurance is active and ask for policy dates.
- Provide WSIB/WCB clearance or coverage documentation in writing.
- Get itemised pricing: demolition, rough-in changes, waterproofing, tile labour, trim, glass, disposal.
- Ask whether permits and inspections are included, and who submits paperwork.
- Check what’s excluded (old subfloor repairs, asbestos assessment/abatement, disposal fees).
- Verify tile and waterproofing details: membrane type, coverage at seams, niche detailing.
- Confirm electrical scope: GFCI locations, exhaust fan wiring, heated floor circuit (if included).
- Require a specific start date and a realistic completion window based on cure times.
- Review warranty: workmanship duration and any coverage limitations.
- Use a payment schedule with a small deposit and a holdback until punch list is done.
- Ensure materials allowances are stated (and whether you’ll pay only for overages).
Common red flags in Haliburton Village include: (1) quotes that are not itemised and hide assumptions about waterproofing or electrical; (2) contractors who avoid discussing permits/inspections or who say “no need to worry” about electrical licensing; (3) vague timelines without cure and scheduling buffers; (4) missing insurance/WSIB paperwork; and (5) warranties that only cover product defects while excluding workmanship issues.
Frequently asked questions — bathroom renovation in Haliburton Village
Do I need a permit for a bathroom renovation in Ontario?
In Ontario, cosmetic work usually does not require a permit—so swapping fixtures, repainting, and replacing a vanity without changing plumbing or electrical routes typically stays in the no-permit category. Where permits usually come in is when you relocate plumbing (moving a shower drain or supply lines), make changes that involve new ventilation ducting with new electrical circuits, or alter structural framing. Electrical work must meet code and be done or signed off by a licensed electrician. For a Haliburton Village bathroom, the practical test is simple: if the quote includes new rough-in lines, fan circuit changes, or structural wall changes, ask specifically whether the contractor will pull permits and schedule inspections. A reliable contractor will list what needs inspection and who is responsible.
What's the best tile for a bathroom in Haliburton Village?
For most Haliburton Village bathrooms, porcelain tile is the “best balance” option because it’s durable, holds up well in wet environments, and comes in styles that mimic stone or wood. Ceramic can work beautifully too—especially for budget-friendly renos where the layout is straightforward—but it may be more vulnerable in higher-impact zones over time. Natural stone is a luxury look, but it can add complexity and care needs. The bigger value is choosing the right waterproofing system and correct installation details—because tile fails when water gets behind it. If you’re budgeting, you’ll often see tile work land in the $1,500–$4,500 range for tile installation, and higher-end choices push toward the top of that band.
Should I do a tub-to-shower conversion?
A tub-to-shower conversion is often a smart choice in Haliburton Village because it modernizes the space and improves safety with a lower threshold and easier access. It’s especially worthwhile if your household includes older adults or anyone with mobility concerns. The cost depends on what needs to change in plumbing and waterproofing: if you keep the drain location, you’ll typically pay less than if you’re moving rough-in lines. As a price reference point, many shower installations in this region fall around the $4,500–$9,000 range for shower build scope, and full conversion projects commonly land in the mid-range full renovation band. However, if your existing venting or supply lines are dated, expect scope increases once discovery starts.
How do I prevent mold in a Haliburton Village bathroom?
Mould prevention is mainly about controlling moisture at three points: the waterproofing layer, the ventilation pathway, and the drying time. Start with a proper shower waterproofing system and fully detailed seams and transitions—corner failures and weak transitions are the usual culprit, not “bad luck.” Then upgrade (or verify) your exhaust fan performance and make sure ducting is correctly routed. If you only replace fixtures but keep an undersized or poorly ducted fan, humid air lingers and mould risk rises. In older Haliburton Village homes, ventilation may have been designed for older bathroom usage patterns. Finally, seal well where water can escape—around tub/shower edges and at fixtures—and avoid oversized gaps in grout and caulk.
What adds the most resale value in a bathroom reno?
Resale value typically comes from improvements buyers can “see” and improvements buyers feel confident about. Visible items include a clean, modern vanity, updated lighting, and a well-finished shower (tile with a durable waterproofing system). Function and safety add a lot too: good exhaust fan performance, properly placed GFCI-protected outlets, and updated plumbing connections. In Ontario, buyers also pay attention to whether the reno looks professionally finished—straight lines, consistent grout joints, and clean glass/caulk transitions. If you’re deciding where to spend, aim for a mid-range full renovation scope when the layout is staying similar; many homeowners target the $12,000–$28,000 band depending on tile and electrical updates. High-end touches like heated floors or premium steam-ready upgrades increase cost, but they should be added only after waterproofing and ventilation are fully addressed.
Can I keep my existing plumbing layout to save money?
Yes—keeping the existing plumbing layout is one of the most reliable ways to control cost in Haliburton Village. When you don’t move drain or supply lines, you avoid major rough-in work, cutting and patching, and a bigger risk of hidden problems behind walls. That keeps you closer to a mid-range renovation budget rather than triggering a fuller re-pipe. Even within the same layout, you can still upgrade the performance by updating valves, replacing supply lines where needed, adding or improving exhaust fan wiring, and ensuring new GFCI outlets are installed correctly. The key is to ask your contractor to confirm what they will inspect once walls are open—especially in older homes—so you can budget confidently if cast-iron drains, galvanized pipes, or asbestos-containing materials are discovered.